
728x90
반응형

💁♀️ 작업하는 순서를 알아봅시다.
◾ html을 만든다.
◾ 임의의 test 패키지 만들기
◾ Controller 패키지, Sevice 패키지 등 작업에 따라 패키지를 분류하고 생성한다.
◾ 클래스를 생성하고 서버를 작업한다.
--> 기능을 알 수 있는 이름을 붙인다. ex) TestController
◾ Controller 패키지의 경우, 스프링에게 Controller 역할을 한다고 알려주기 위해 @Controller 어노테이션을 적용한다.
◾ 페이지를 리턴한다.
◾ Service 패키지 안에 클래스를 생성한다.
◾ DAO를 생성한다.
◾ 쿼리 파일을 생성한다.
📝test01.html
<!DOCTYPE html>
<html xmlns:th="http://www.thymeleaf.org">

<head>
    <meta charset="UTF-8">
    <meta http-equiv="X-UA-Compatible" content="IE=edge; chrome=1">
    <!-- 장비 기준, 100%-->
    <meta name="viewport" content="width=device-width, initial-scale=1.0">
    <title>Document</title>
</head>

<body>

    <div class="login_wrap">
        <h1>상품 가격 검색하기</h1>
        <form class="login_f" method='get' action='/test/test02'>
            <p>
                <label for="item_id">상품 이름</label>
                <input type="text" name="item_id" id="item_id" placeholder="상품의 이름 입력" />
            </p>
            <p>
                <label for="user_pw">사용자 비밀번호</label>
                <input type="password" name="user_pw" id="user_pw" placeholder="사용자의 비밀번호 입력" />
            </p>
            <p><input type="submit" value="검색" class="login_btn" /></p>
        </form>
    </div>

    <div>
        <span th:text="${item_Nm}"></span> 상품 가격 : <span th:text="${item_id}"></span>
    </div>
</body>

</html>
📝TestController.java
package com.shop.test.controller;

import javax.servlet.http.HttpServletRequest;

import org.springframework.beans.factory.annotation.Autowired;
import org.springframework.stereotype.Controller;
import org.springframework.ui.Model;
import org.springframework.web.bind.annotation.GetMapping;
import org.springframework.web.bind.annotation.RequestMapping;

import com.shop.test.service.TestService;
import com.shop.test.vo.TestItemVO;

@Controller
@RequestMapping("/test")
public class TestController {
	@Autowired
	TestService service;

	@GetMapping("/test01")
	public String test01() {
		return "test/test01";
	}

	@RequestMapping("/test02")
	public String test02(HttpServletRequest request, Model model) {

		TestItemVO resultObj = service.itemBusiness(request);
		model.addAttribute("item_Nm", resultObj.getItem_nm());
		model.addAttribute("item_id", resultObj.getPrice());

		return "test/test01";
	}
}
📝TestService.java
package com.shop.test.service;

import java.util.HashMap;
import java.util.Map;

import javax.servlet.http.HttpServletRequest;

import org.springframework.beans.factory.annotation.Autowired;
import org.springframework.stereotype.Service;

import com.shop.test.dao.ITestDAO;
import com.shop.test.vo.TestItemVO;

@Service
public class TestService {
	@Autowired
	ITestDAO testDAO;

	public TestItemVO itemBusiness(HttpServletRequest request) {

		String itemID = request.getParameter("item_id");

		Map<String, String> mapParam = new HashMap<String, String>();
		mapParam.put("item_id", itemID);

		TestItemVO vo = testDAO.selectItem(mapParam);

		return vo;
	}

}
📝TestItemVO.java
package com.shop.test.vo;

import java.math.BigInteger;
import java.sql.Timestamp;

import lombok.Data;

@Data
public class TestItemVO {
	private BigInteger item_id;
	private Timestamp reg_time;
    private Timestamp update_time;
    private String create_by;
    private String modified_by;
    private Long ltem_detail;
    private String item_nm;
    private String item_sell_status;
    private Integer price;
    private Integer stock_number;
}
📝ITestDAO.java
package com.shop.test.dao;

import java.util.Map;

import org.apache.ibatis.annotations.Mapper;

import com.shop.test.vo.TestItemVO;

@Mapper
public interface ITestDAO {
	public TestItemVO selectItem(Map<String, String> map);
}
📝ITestDAO.xml
<?xml version="1.0" encoding="UTF-8"?>
<!DOCTYPE mapper
PUBLIC "-//mybatis.org//DTD Mapper 3.0//EN"
"http://mybatis.org/dtd/mybatis-3-mapper.dtd">
<mapper namespace="com.shop.test.dao.ITestDAO">
<select id="selectItem" parameterType="java.util.HashMap" resultType="com.shop.test.vo.TestItemVO">
select * from item where item_nm like concat('%', #{item_id}, '%')
</select>
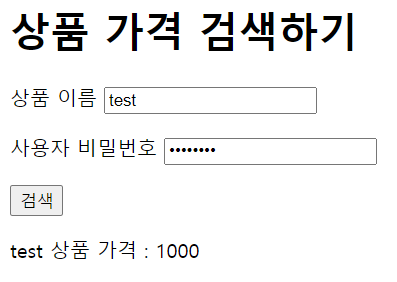
</mapper>💡 실행 화면
728x90
반응형
'Back-End > Spring Boot' 카테고리의 다른 글
| Spring Boot - 실습 test파일 수정 (0) | 2022.07.27 |
|---|---|
| Spring Boot - 상품 등록하기 (0) | 2022.07.27 |
| Spring Boot - 로그인 예제 ( html, server 연동 ) (0) | 2022.07.26 |
| Spring Boot - JPA 지연 로딩 (0) | 2022.07.25 |
| Spring Boot - javax.validation 어노테이션 예시 (0) | 2022.07.25 |


댓글